How to add Floating Ads in AZO ADS
In this tutorial, we will show you how to add Floating Ads in AZO Ads Pro
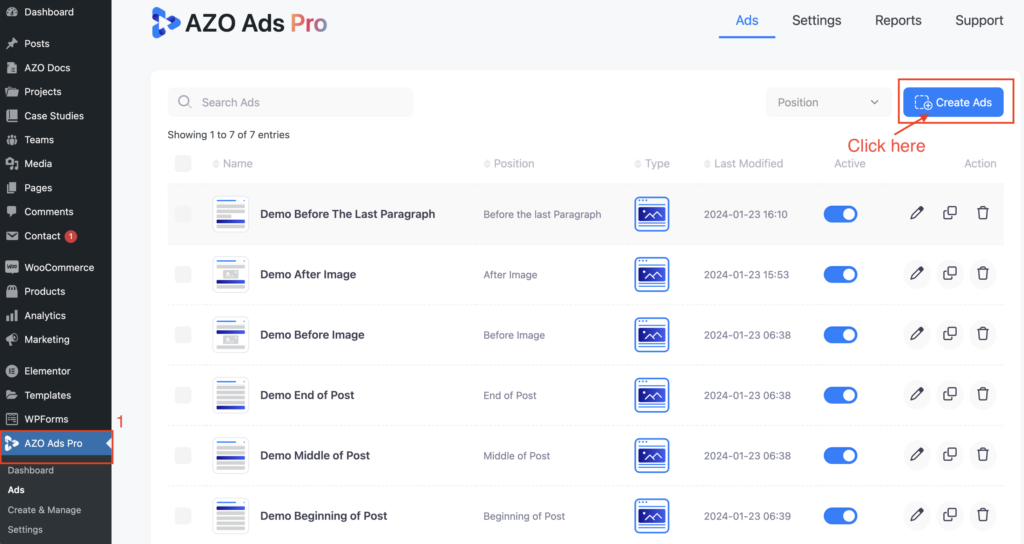
Step 1: Once you install our AZO ADS plugin then go to WordPress Dashboard navigate to Dashboard ->AZO Ads Pro
Step 2: Click on Create Ad to add an ad just like in the screenshot below.
Step 3: Select the Ads position as per your requirement, but in case of creating Floating Ads, we can ignore this step, and we recommend you choose Beginning of Post to avoid unexpected errors, then click Continue.

Step 4: Select the Ads Type : Floating Ads which you can see in the below screenshot.

Step 5: Enter your Ad title, then upload your floating ad, and modify ad as per your requirement.

Step 6: Enter your Ad label and modify Ad’s properties as per your requirement, then click Continue.

Step 7:
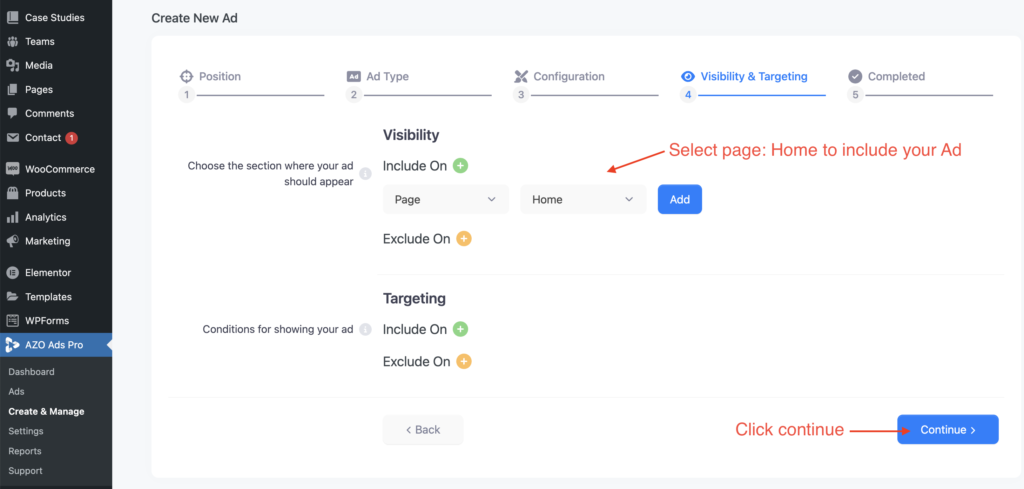
You need to set the Placement of the Ads whether you want to show the Ads on specific Posts/Pages or all posts, etc, then click continue.
For eg: If you want to show the Ads only for page Home then you need to set the placement like “Page —> Home”
You’ll see all your ads on Homepage.
Output of Floating Ads:

We appreciate your time spent on this tutorial!
We genuinely hope it has proven helpful to you. If you have any feedback, questions, or specific requests for compatibility with additional Ad companies not currently covered by our plugin, please do not hesitate to contact us. Your input is invaluable, and we assure you that we are dedicated to promptly addressing and implementing any such suggestions.
Feel free to reach out to us here; we are always here to assist you in any way we can. Thank you for your attention and participation.